
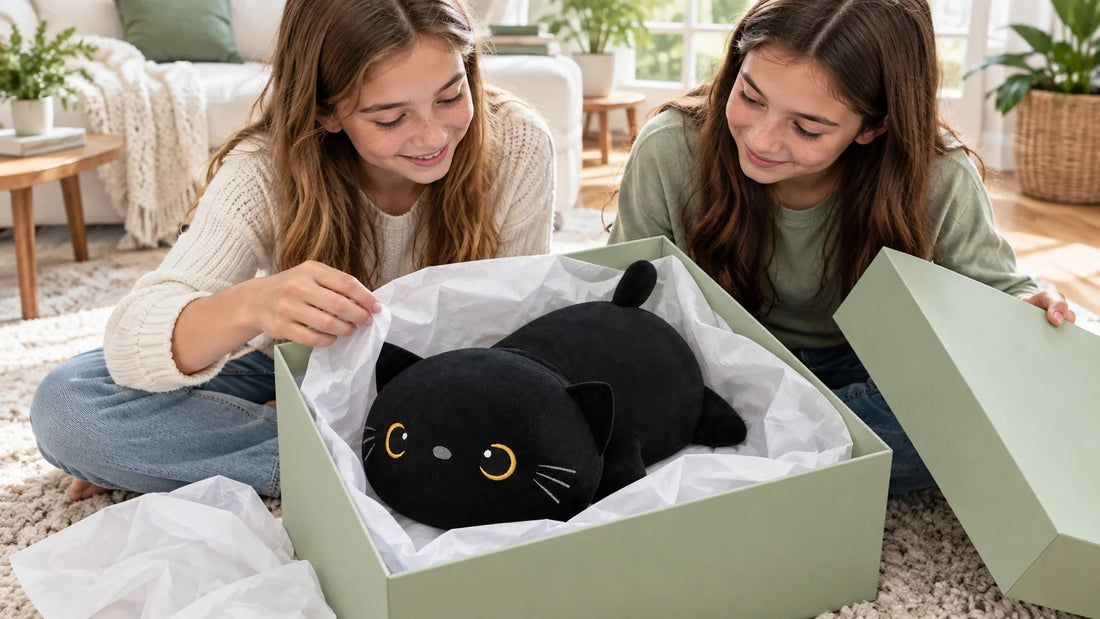
The easiest answer to how to wrap a stuffed animal is usually a roomy gift bag or a box that closes without pressing on the toy. Wrapping paper behaves well around straight edges. Around ears, paws, and a rounded body, it needs a little help.
Before cutting anything, put the toy beside your available packaging. Check the opening as well as the space inside. A bag can look generous until you try to get a wide plush head through its narrow top. If you need to squeeze the toy to make it fit, choose something else.
How to wrap a stuffed animal: choose your method
For a quick hand-delivered gift, start with a ready-made bag. Use a box when you want flat surfaces to wrap or a supported base. Fabric works when you have a large enough piece and don't need to hide every clue about the shape.
| Method | Useful when | Check first |
|---|---|---|
| Gift bag | You want a quick finish without folding paper around the toy. | The opening, base, and handles suit the actual item. |
| Gift box | You want a supported package with straight edges. | The lid closes freely and the toy fits without pressure. |
| Fabric wrap | You have enough clean cloth to cover an irregular shape. | The ends meet with slack; the knot won't squeeze the plush. |
What to gather before you start
Clear a dry work surface and bring over your chosen bag, box, or cloth. Keep tissue paper nearby if you want a layer between the toy and its wrapping. For a box, you'll also need paper, scissors, and tape. Leave ribbon until you've checked the fit.
Measure the toy in the position it will occupy. Length alone doesn't tell you the width of the head or the height of the ears. Our stuffed animal size guide explains how to use dimensions rather than judge size from a photograph. You still need to check the packaging's usable inside space.
Keep care and product information with the gift. If you remove a price sticker, take care not to tear off instructions that the recipient will need. A gift receipt can go in a separate envelope.
Method 1: use a gift bag without a box
This is a straightforward option when you're working out how to wrap a stuffed animal without a box. Choose a bag that opens wide enough for the toy and has room above it for tissue or a loose closure.
Open the bag fully and inspect the bottom. Put it on the table so you aren't supporting everything by the handles while you pack.
Place a sheet of tissue inside if desired. Lower the plush onto the base, supporting its body with your hands. Don't push down on the face to force it past the opening.
Arrange a little tissue over the top. Keep the ears and tail in their natural positions instead of folding them tightly to hide the toy.
Add a card or ribbon to the bag, then check how you will carry it. Support the base of a heavier gift rather than relying on paper handles.

If the bag bows outward or won't close without pressure, a larger one is the simpler fix. More tissue will not make a weak base stronger. A handmade paper bag may look attractive, but don't assume it can carry the same load as a sturdy box.
Method 2: wrap the box instead of the plush
Set the toy inside an empty box first. Lower the lid gently and lift it again if it catches on the plush. Keep enough space for the toy's natural shape, without choosing a box so large that the contents roll around.
Purdue Extension's gift-wrapping manual recommends a clean, sturdy box with an appropriate fit. That gives you a useful starting point. A soft toy still needs its own fit check, especially around attached ears or a tail.
Line the box lightly if you want tissue around the gift. Set the plush inside and keep any detached accessories together in a suitable inner container.
Close the lid without pressing it flat against the toy. Move to a deeper box if necessary.
Lay the closed box on the paper. Bring the long sides around it and check that they overlap before cutting. Leave enough at each short end to fold over the box.
Tape the long overlap to the paper. At each end, fold the side paper inward, then bring the upper and lower flaps over it. Tape those flaps to the wrapping, not to the toy.
Attach the ribbon around the closed box. You don't need to tie it around the plush itself. If a fold looks untidy, adjust the paper rather than tightening the package.
Method 3: make a loose fabric wrap
Use clean, dry cloth with enough coverage to bring opposite corners together above the toy. Try the fit before tying anything. If the corners barely meet, find a larger piece rather than pull harder.
Lay the cloth flat and place the plush in the middle. Turn the cloth diagonally if that gives the ends more room.
Bring one pair of opposite corners over the body. Fold or tuck the ends loosely so the face and attached parts aren't pressed out of shape.
Bring the remaining corners together above the first fold and tie an easy-to-undo knot. Keep slack around the toy.
Support the bundle from below when moving it. The knot closes the wrapping; it is not a tested carrying handle.

You may still be able to guess what's inside. Use a box if concealing the shape matters more than the fabric finish. Don't add tighter knots to make the bundle look smaller.
Large and weighted plush need a different carrying check
Consider the weight as well as the space. The SQEQE black cat plush listing describes weighted beads at the bottom. That is a reason to check the packaging and support the base, not to assume any particular gift bag has enough strength.
For a large toy, lay out the cloth or open the bag before decorating it. A roomy fabric sack may be easier to manage than joining several small sheets of paper. Keep any closure above the toy rather than cinched around its neck or body.
The black cat listing also notes vacuum packaging. If you want to present it unpacked, allow time for the toy to regain its shape before choosing the final wrapping. Our vacuum-sealed stuffed animal guide covers that separate preparation step. Don't measure only the compressed delivery package.
Before handing over the gift
Check that no tape touches the plush and that no part is trapped under a lid. Lift the package a little while supporting its base to see whether anything shifts. Gift wrapping is for presentation; if you're mailing the toy, use suitable outer shipping packaging and the carrier's current instructions.
Remove bags, ribbons, and other packaging before a young child plays with the toy, and have an adult handle scissors. Follow the product's age guidance. If you're still deciding which toy to give, use the weighted stuffed animal gift guide; this article focuses on packaging an item you've already chosen.
What we checked
We reviewed Purdue Extension's gift-wrapping manual and the linked SQEQE black cat product page on September 30, 2026. These instructions are general gift-presentation guidance, not a tested load rating for bags, boxes, or fabric. Packaging strength varies. Use the actual toy and container to check the fit, and don't treat a generated illustration as a measurement or product test.
FAQ
What is the easiest way to wrap a stuffed animal?
If you want a quick answer to how to wrap a stuffed animal, try a roomy gift bag with a suitable base. For a heavier toy, check the bag's strength and carry it from underneath, or choose a sturdy box.
Can I wrap a stuffed animal directly in paper?
You can, but the rounded shape makes neat folds harder. Keep tape on the paper and leave room for attached parts. A bag or box is usually easier than trying to fold tight corners around the toy.
How do I wrap a large stuffed animal without squeezing it?
Check a larger bag or fabric wrap before trying to compress the toy. The opening and closure need enough room too. If the wrapping pulls the toy out of shape, change the wrapping.
Should I leave the care label attached?
Yes. Keep the care information available to the recipient. Removing a price sticker is different from cutting off the toy's sewn-in label.
Let the wrapping fit the toy
Once you've worked out how to wrap a stuffed animal, keep the final check simple: the toy fits naturally, the packaging supports it, and the recipient can open it without pulling tape from the fabric. Finish the outside after those details are settled.


